

Table of Contents
- What You'll Need Before Starting
- Signs of Cricket Bat Damage: Identifying Cracks and Splits
- Step 1: Assess the Severity of the Crack
- Step 2: Clean and Prepare the Damaged Area
- Step 3: Apply the Best Wood Glue for Cricket Bats
- Step 4: Clamp and Allow the Repair to Set
- How to Knock In a Cricket Bat After Repair
- Cricket Bat Oiling Guide: Protecting Against Future Cracks
- Frequently Asked Questions
Last Updated: September 19, 2026
What You'll Need Before Starting
Before you attempt to fix cricket bat cracks, gather the right materials and tools. You'll need a good wood glue designed for cricket bat repairs, clamps to hold the wood whilst it dries, fine-grit sandpaper, and a clean cloth. A small brush helps apply glue evenly into the crack.
The quality of your glue matters enormously. Standard PVA adhesives work for minor surface damage, but deeper cracks demand something stronger. Look for glues that cure to a hard finish and won't shrink as they dry, which would leave gaps in your repair.
You'll also want safety gear: wear gloves and work in a well-ventilated space. Some repair jobs require a heat source or moisture control, depending on the crack's depth and location on the bat.
| Item | Purpose | Notes |
|---|---|---|
| Wood glue | Bonds cracked wood | Must be cricket bat-rated |
| Clamps | Holds wood whilst drying | At least 2 needed |
| Sandpaper | Smooths repair area | 120-220 grit |
| Clean cloth | Removes dust and excess glue | Cotton works well |
| Small brush | Applies glue into cracks | Natural bristles preferred |
Signs of Cricket Bat Damage: Identifying Cracks and Splits
Knowing what you're dealing with is half the battle. Not all bat damage is the same, and how you treat a crack depends on where it is and how deep it goes.
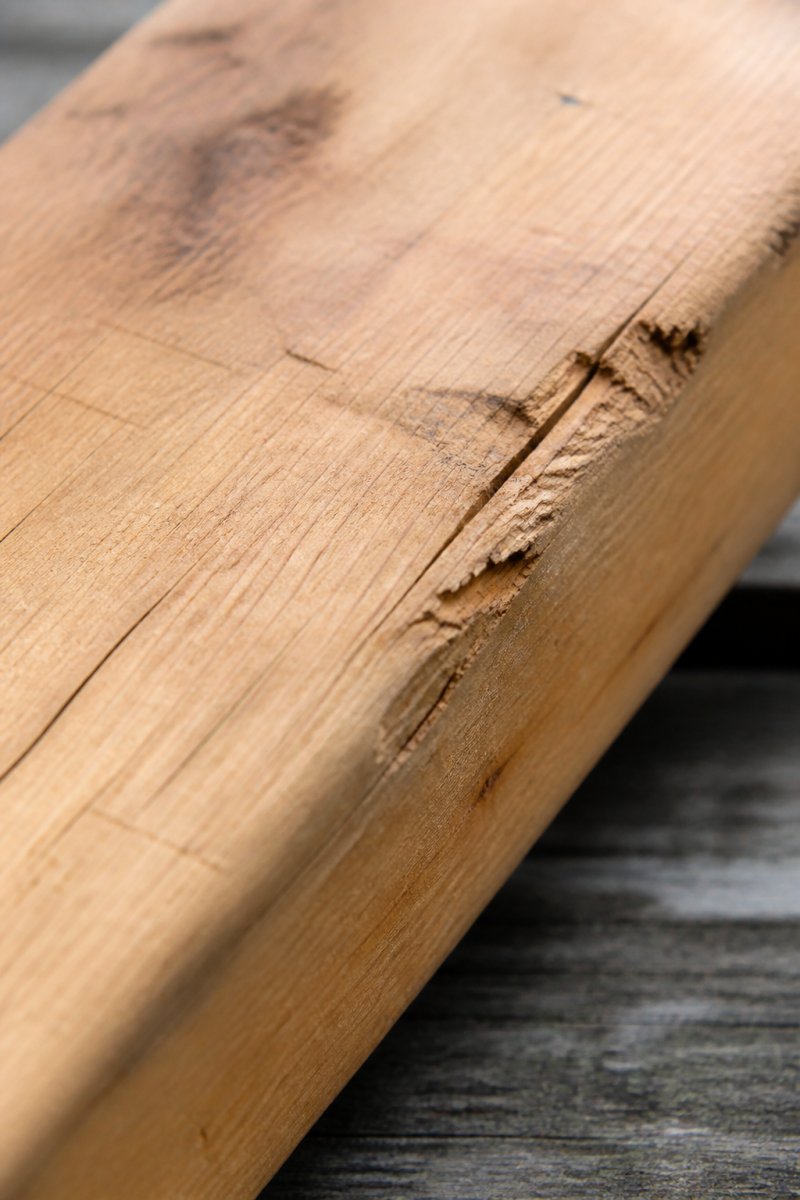
Surface cracks versus structural splits
Surface cracks are shallow lines that run across the face or edges of the bat. They look worse than they are. These typically happen from impact during play or from the bat drying too quickly after use. You'll spot them as thin lines, often less than a millimetre deep.
Structural splits are the serious ones. These run along the grain of the wood, often following the cleft from handle to toe. A structural split means the wood fibres have actually separated. This weakens the entire bat and affects how it performs.
Here's the key difference: surface cracks stay on the surface. Structural splits go deep. If you can run your fingernail along the crack and feel it catch, it's likely structural.
Other damage to watch for includes edge damage (where the edge has been chipped or flattened) and toe damage (where the bottom of the bat shows cracks or splits). These are common from hitting the ground during play or from bowling machines that catch the toe.
Step 1: Assess the Severity of the Crack
Before you pick up any tools, spend five minutes properly evaluating the damage. This tells you whether you're looking at a quick fix or a job beyond repair.
Start by looking at the crack's location. Cracks near the toe are more serious than those near the shoulder. Cracks that run along the grain (lengthwise) are worse than those that run across the grain. A lengthwise crack on the face of the bat, especially near the toe, suggests structural damage.
Check the depth next. Use a thin tool like a butter knife or old credit card. Gently try to slide it into the crack. If it goes in more than a few millimetres, you're dealing with something substantial. Surface cracks usually stop you after 2-3mm.
Look at how the wood around the crack behaves. Press gently on either side of the crack. If the pieces move or flex independently, the crack has opened up significantly. This means the wood has actually separated, not just cracked on the surface.
Consider the bat's age and history. A brand-new bat with a crack suggests a manufacturing flaw or impact damage. An older bat with multiple cracks suggests fatigue in the wood. Old bats are riskier to repair because the wood may be weakened throughout.
Step 2: Clean and Prepare the Damaged Area
Proper preparation makes the difference between a repair that holds and one that fails within weeks.
Start by cleaning the crack thoroughly. Use a dry brush or compressed air to remove all dust, dirt, and debris from inside the crack. Any contamination will weaken the glue bond. If the crack is dirty, use a slightly damp cloth to clean it, then let it dry completely before moving forward. Moisture inside the crack will prevent proper glue adhesion.
Once clean, inspect the crack edges. If they're rough or splintered, use fine-grit sandpaper (180-220 grit) to smooth them gently. Don't oversand, you're just removing loose fibres, not widening the crack. Sand lightly along the grain.
If the crack has opened up noticeably, you may need to gently encourage the wood back together. Don't force it. If the wood is too stiff, apply a small amount of moisture to soften the fibres slightly, then work the pieces together gently. This takes patience.
Wipe away all dust with a clean, dry cloth. Any remaining particles will create weak spots in your repair.
Custom Made Cricket Bats | Buy Melbourne →
Step 3: Apply the Best Wood Glue for Cricket Bats
This is where precision matters. The right glue, applied correctly, holds a bat together for years. The wrong approach leads to failure.
Choose a two-part epoxy or a specialist cricket bat adhesive. These cure harder and stronger than standard PVA glues. They also shrink less, which means fewer gaps in your repair. Read the instructions carefully, different glues have different mixing ratios and cure times.
Apply the glue sparingly but thoroughly. Use a small brush to coat both sides of the crack. You want a thin, even layer, not a glob. Too much glue creates mess and weak spots as it squeezes out. Too little leaves gaps where the wood doesn't bond properly.
For deep cracks, apply glue in layers. Coat the first side, let it sit for 30 seconds, then coat the other side. This ensures both surfaces are properly wet before clamping.
Work quickly but carefully. Most cricket bat glues have a limited working time before they start to set. Once you've applied the glue, you need to clamp within a few minutes.
Step 4: Clamp and Allow the Repair to Set
Once the glue is applied, clamping holds the wood together whilst it cures. This is non-negotiable.
Position your clamps carefully. You want even pressure across the entire crack, not just at one point. Use at least two clamps, positioned on opposite sides of the bat. Tighten them gradually, a quarter-turn at a time, until the crack closes completely. Don't overtighten, you're holding the wood together, not crushing it.
Place a thin piece of cloth or cardboard between the clamp and the bat. This protects the wood from being marked by the clamp jaws.
The curing time depends on your glue. Most cricket bat adhesives need 24 hours to cure fully. Some need longer. Check your glue's instructions and don't rush this step. A bat unclamped too early will have a weak repair that fails quickly.
Whilst the glue cures, keep the bat in a stable position. Don't move it around or expose it to temperature changes. A consistent environment helps the glue cure evenly.
After curing, remove the clamps carefully. You may see excess glue that squeezed out during clamping.
How to Knock In a Cricket Bat After Repair
A repaired bat needs to be knocked in before you use it again. This process compresses the wood fibres and helps the bat settle into its final performance state.
Cricket Bat Oiling Guide: Protecting Against Future Cracks
Oiling is your best defence against future cracks. It keeps the wood hydrated and prevents the drying that leads to splits.
Frequently Asked Questions
Are surface cracks on a cricket bat normal?
Surface cracks are common, especially in new bats or those exposed to temperature changes and humidity fluctuations. Minor surface checking is normal as English willow adjusts to playing conditions. However, you should monitor these cracks closely. If they remain shallow and don't spread, they typically don't affect performance. Deeper cracks that penetrate the grain structure require attention to prevent further damage and maintain bat integrity.
Can you use wood glue to fix a cricket bat crack?
Yes, wood glue is effective for repairing cricket bat cracks, particularly surface and minor structural damage. Two-part epoxy wood adhesive works best because it bonds strongly and cures hard, restoring structural integrity. Apply glue into the crack, clamp firmly for 24 hours, then sand smooth once dry. For deep cracks or splits affecting the blade's performance, professional repair is safer. Always ensure the bat is knocked in properly after any repair to restore its playing characteristics.
When should you repair a crack in a cricket bat?
Repair cracks as soon as you notice them. Surface cracks caught early are easier to fix and prevent progression into structural damage. If a crack is spreading visibly, affecting bat performance, or located near the splice, seek professional repair immediately. Playing with a damaged bat risks further deterioration and potential failure mid-match. Professional repair services can assess whether a crack is repairable or whether the bat has reached the end of its life.
What is the difference between a surface crack and a structural split?
Surface cracks are shallow, affecting only the outer willow layer, and typically don't compromise performance. Structural splits penetrate deeper into the blade, affecting the wood's integrity and playing characteristics. Structural damage may cause dead spots, loss of ping, or visible deformation. Surface cracks can usually be repaired at home with wood glue; structural splits require professional assessment. If unsure, err on the side of caution and consult a bat repair specialist to avoid further damage.


